

 Bahasa Indonesia
  Tiếng Việt
  ភាសាខ្មែរ
 .png) Filipino
Filipino .png) ພາສາລາວ
ພາສາລາວ 
Techniques for outdoor mushroom cultivation
Step 1 : Preparing Growing Location
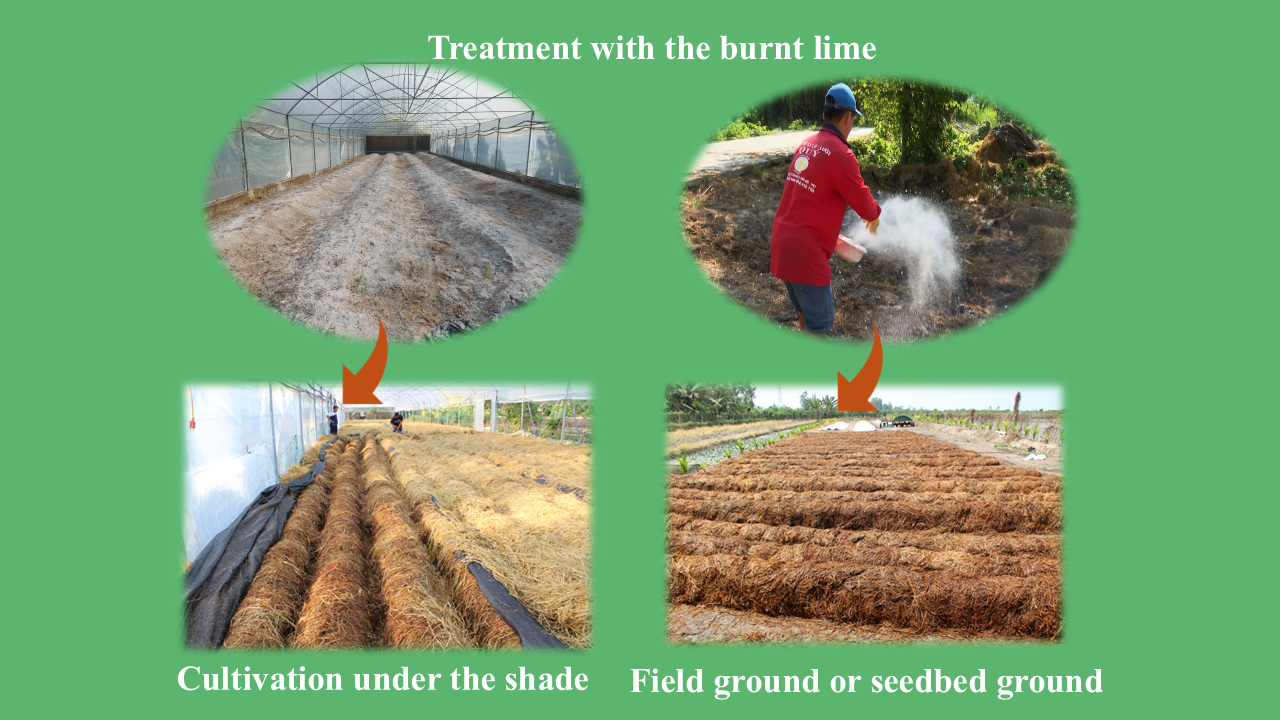
- Straw mushrooms can be cultivated in shaded or direct light locations, such as on fallow field ground or seedbed ground. The chosen growing site must have good drainage to manage watering and rainfall effectively.
- The soil for cultivating straw mushrooms should be treated with lime at a rate of 5 kg/100 m2 (or 300-500 kg/ha).
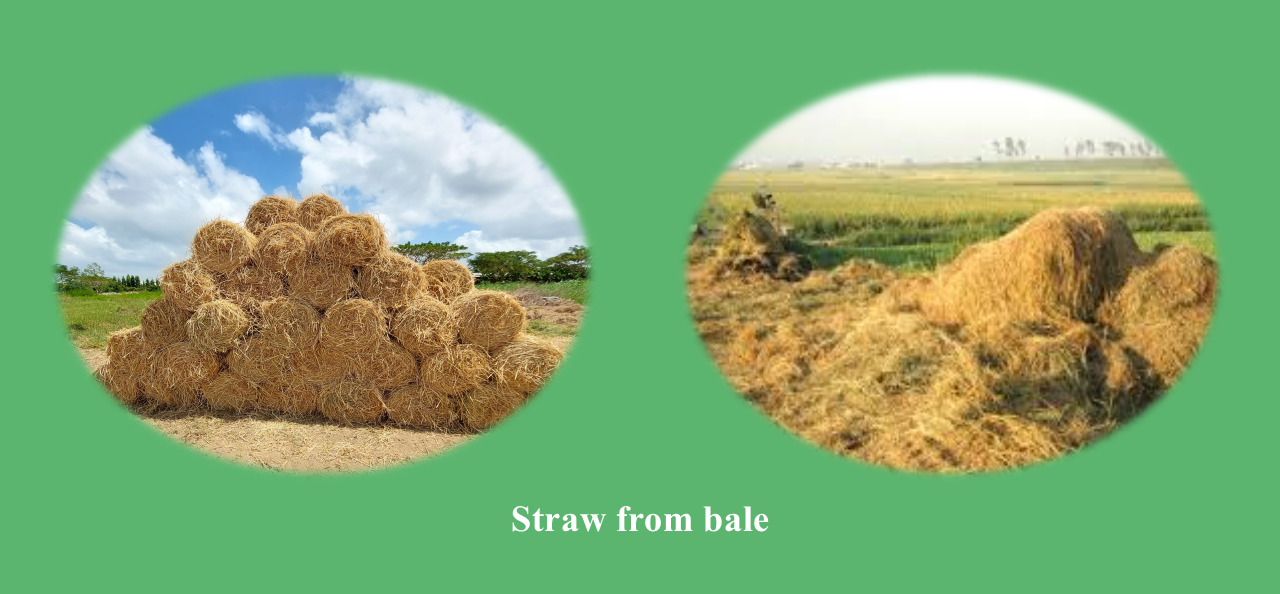
Step 2: Straw Source
The straw source can be in bale form. The straw must be disease-free, unaffected by pesticides, free from salinity and white mold, and not rotten due to rain.

Step 3: Preparing Rice Straw
- Prepare the ground for the compost pile, in a well-ventilated, well-drained area.
- Select a location with a proactive water source
- Break the straw bales apart or split them in half to loosen the material.
Step 4: Stacking and Turning
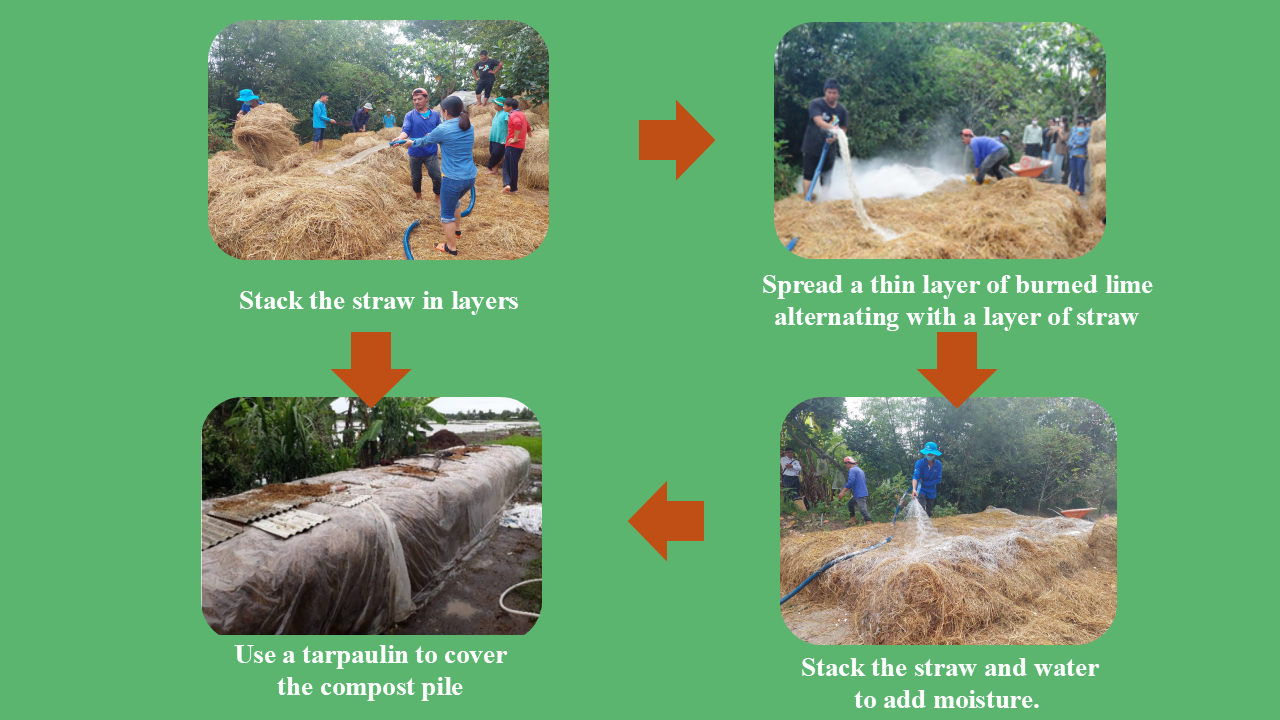
- Stack the straw into layers and alternate with burnt lime.
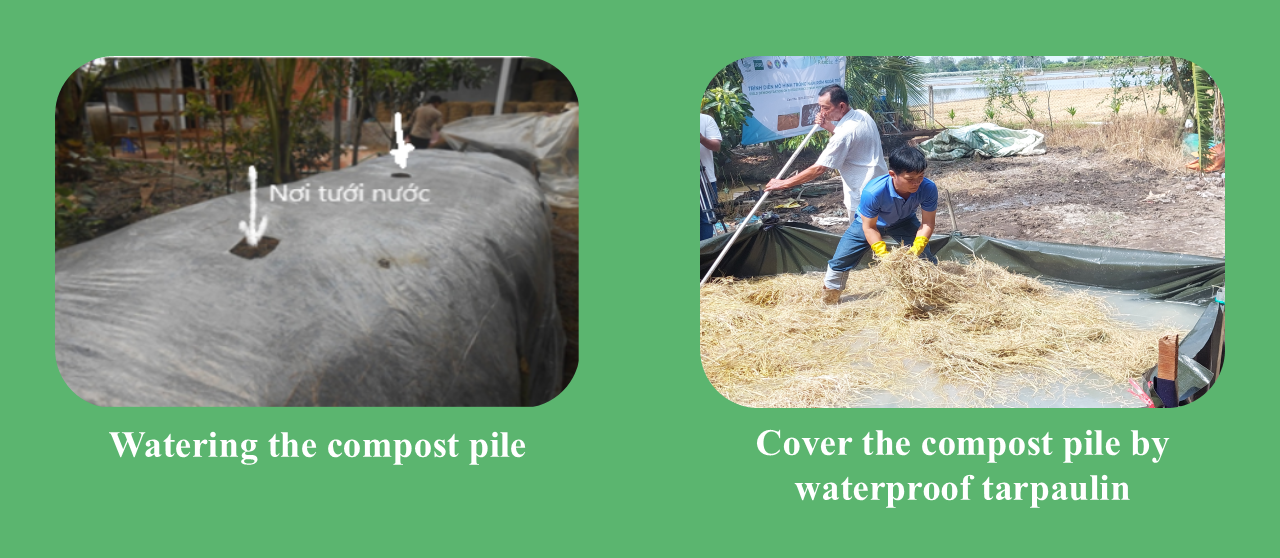
- Water the pile to add moisture.
- Place banana stalks in the middle of the pile to create ventilation for the compost pile
- The amount of straw used should be ≥ 100kg, the size of the compost pile should be about 1.2 – 1.5m high, ≥ 1.5m wide, and at least 1.5m long.
- Use a waterproof tarpaulin to cover the compost pile; ensure there are ventilation holes.
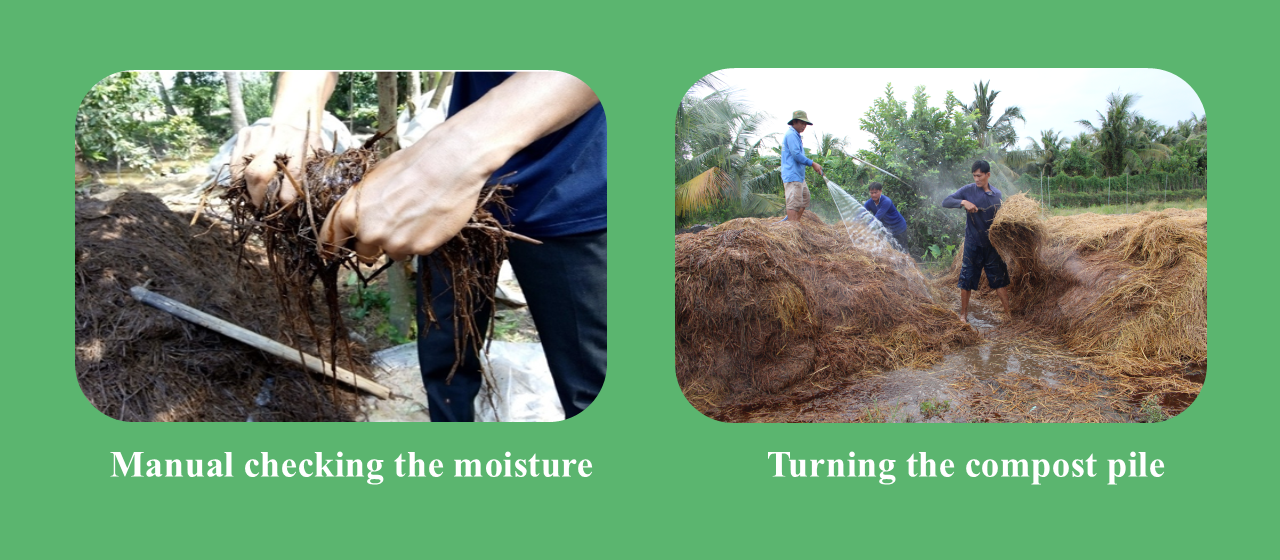
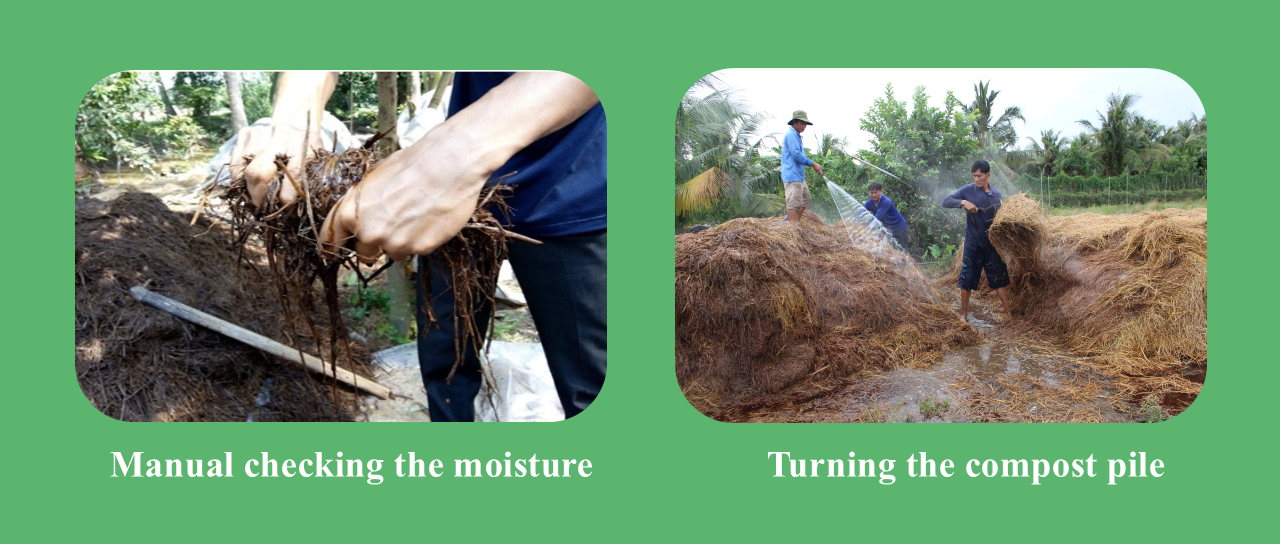
- Monitor humidity levels and add water as necessary, ensuring the temperature remains between 60 – 70°C.
- After 7 and 17 days of composting, turn the pile twice, rotating material from the inside out and outside in.
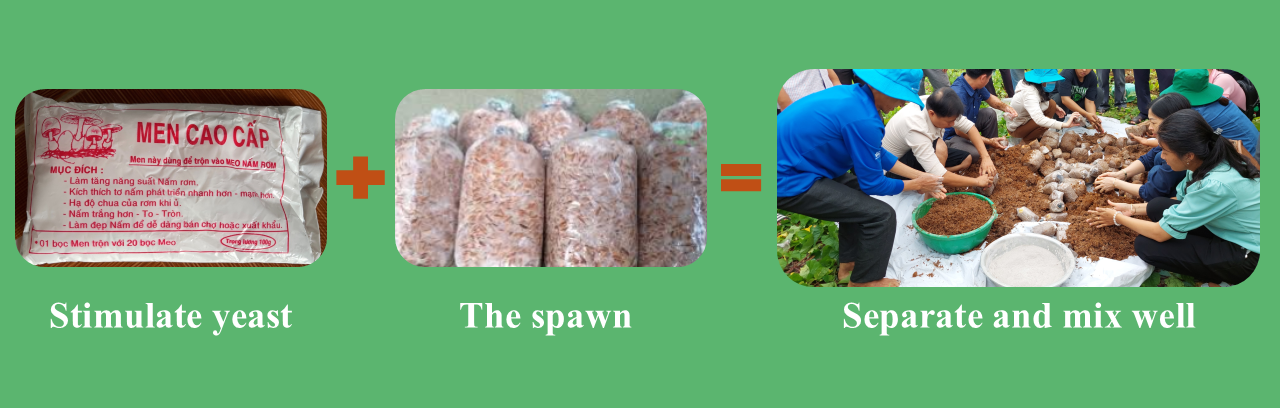
Step 5: Preparing the Mushroom Spawn
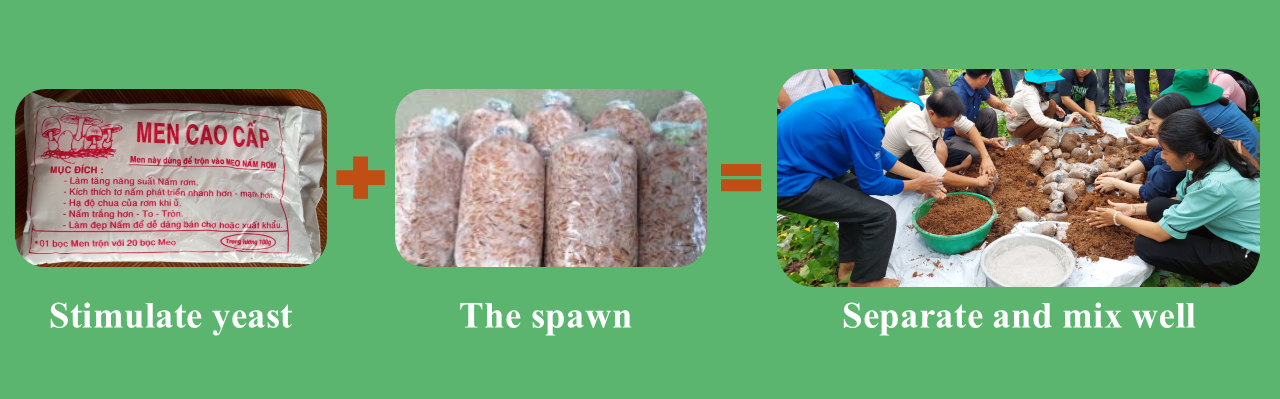
- If using rice husk spawn, choose bags with even white mycelium and a pleasant smell.
- The spawn is separated and mixed with mycelium-stimulating yeast at the recommended ratio. Alternatively, mix with vermicompost (at a dose of 70-160g) and mushroom growth stimulants as recommended.
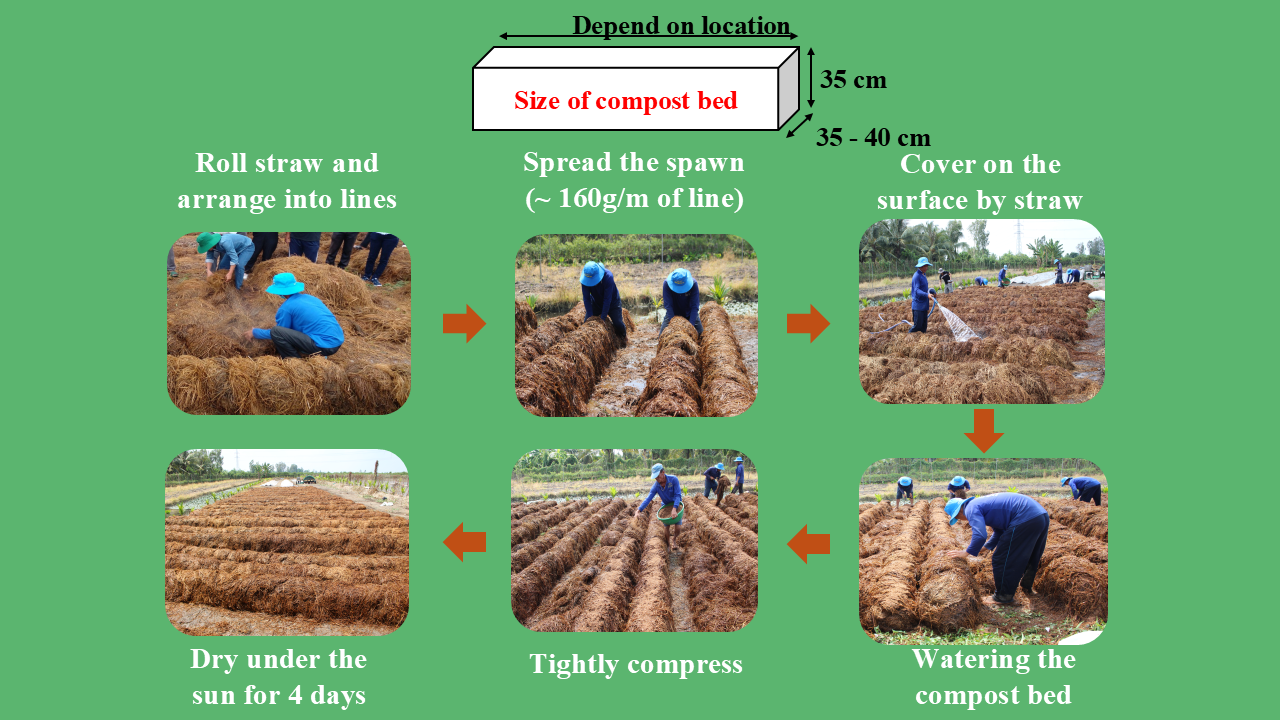
Step 6: Putting Compost in Bed
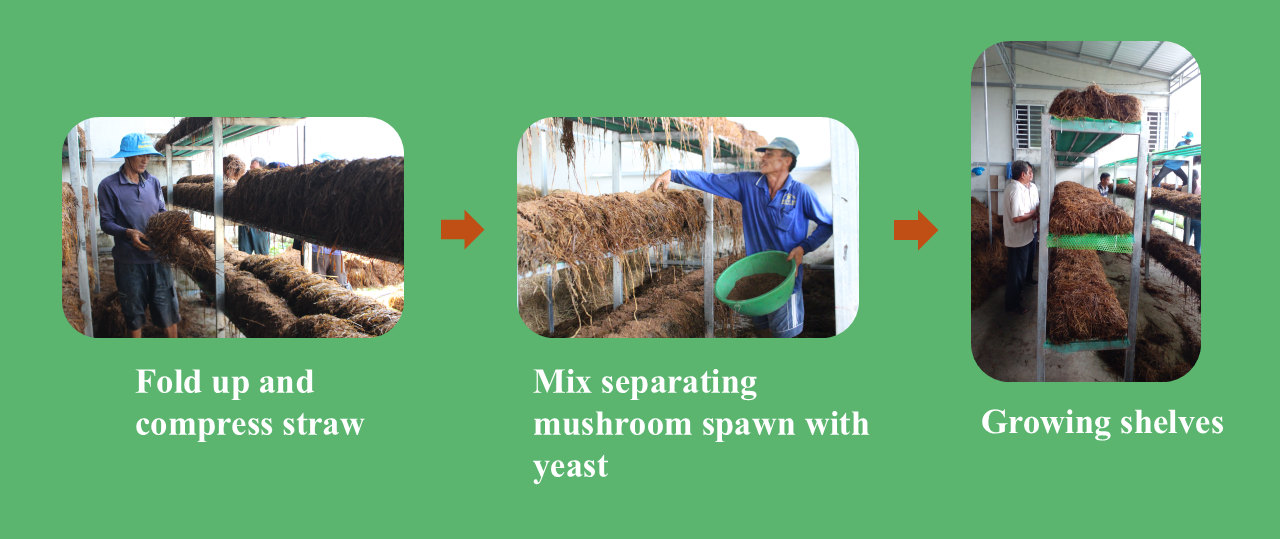
- After composting for 16-18 days, the compost is placed in a bed. The bed should be 35-40 cm wide and 35 cm high. Straw is taken from the compost pile, rolled, and arranged into lines.
- Following this, a layer of spawn is spread in the middle of the line (approximately 160g/m of line).
- Then the surface is covered with another layer of straw.
- The compost bed is then watered. Using both hands, the compost bed is stroked and tightly compressed. Subsequently, the compost bed is exposed to direct sunlight for 4 days.
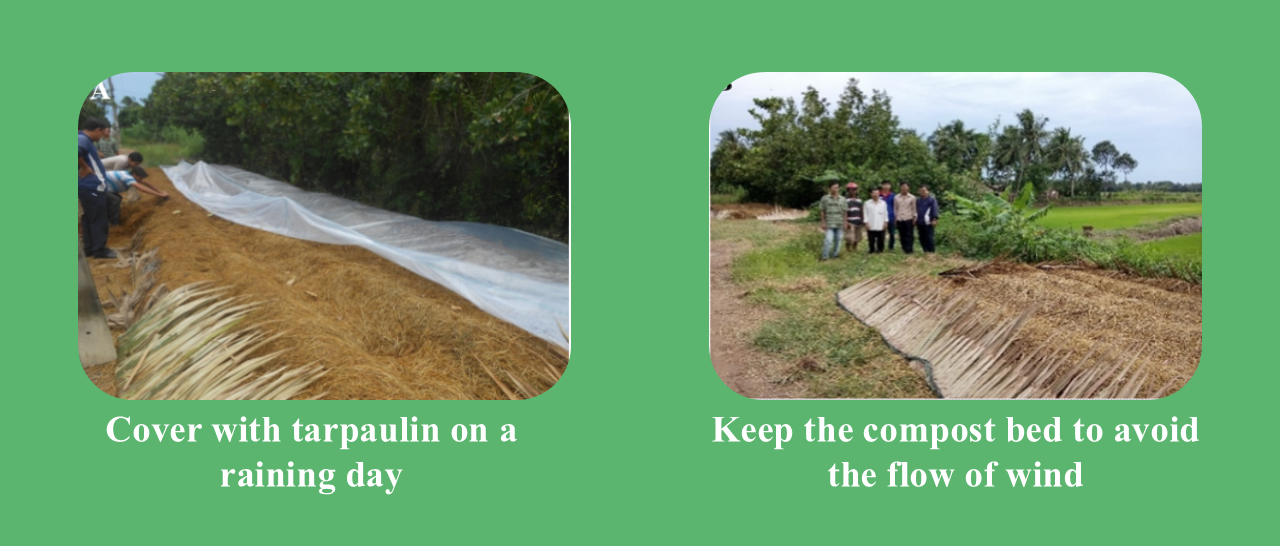
Caution: A tarpaulin should only cover the bed in the rain; make sure the ventilation is good. In windy conditions, arrange the compost lines to avoid direct wind.
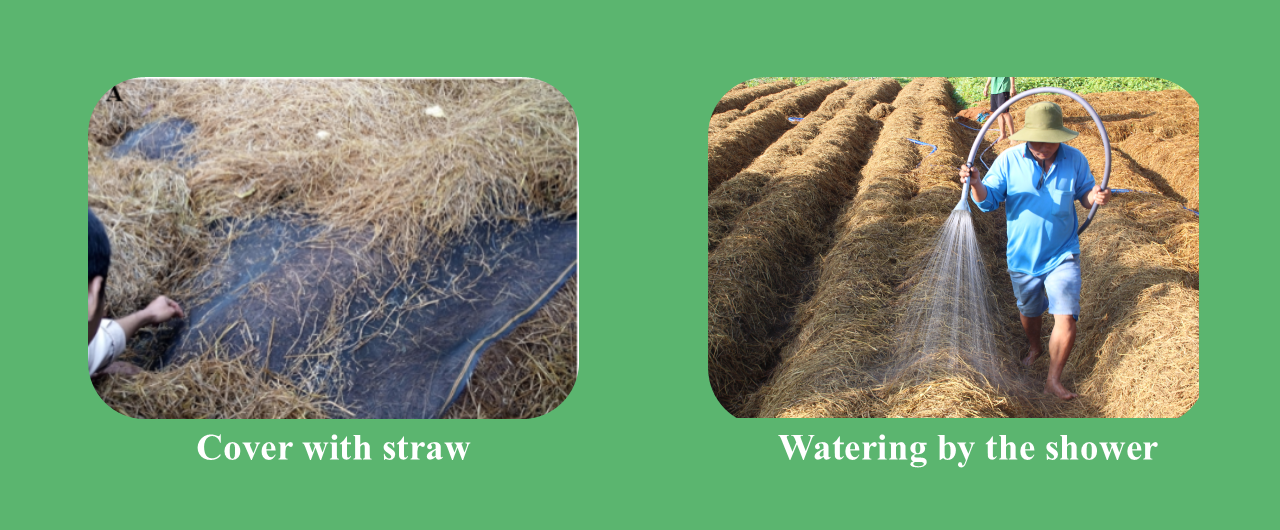
Step 7: Caring and Watering
- After drying in the sun, the bed should be covered with moist straw.
- Watering should be done once daily using a shower head, either in the morning (7-8 am) or the afternoon (about 4 pm).
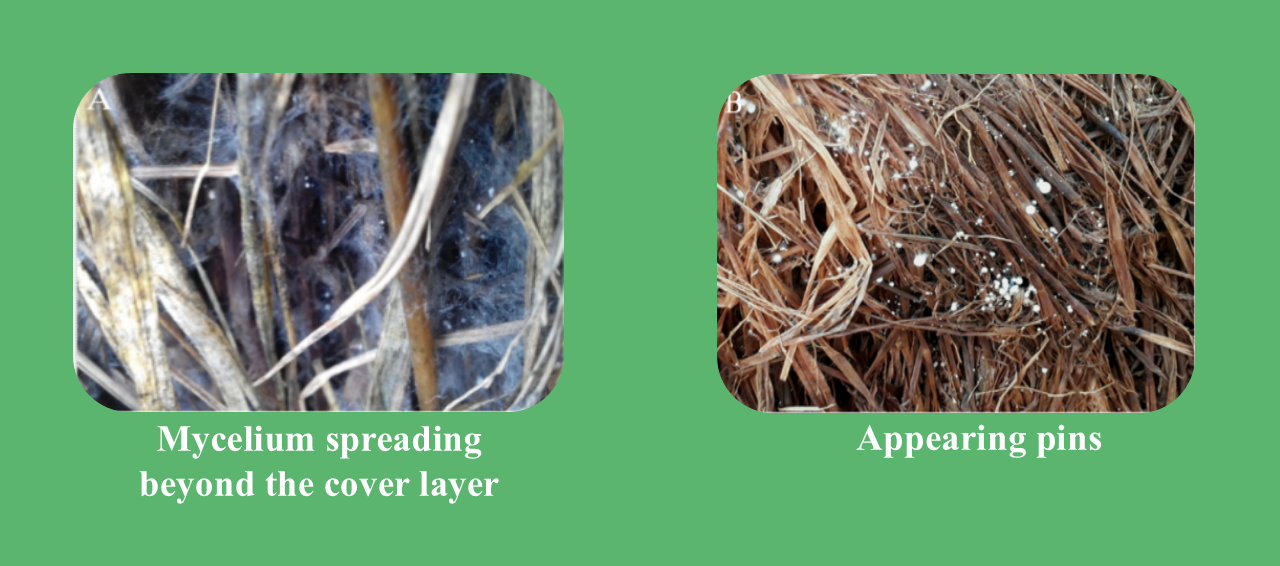
- After covering the straw for 4 to 5 days, check the spread of mycelium and turn the bed cover to limit the mycelium from spreading beyond the cover layer.
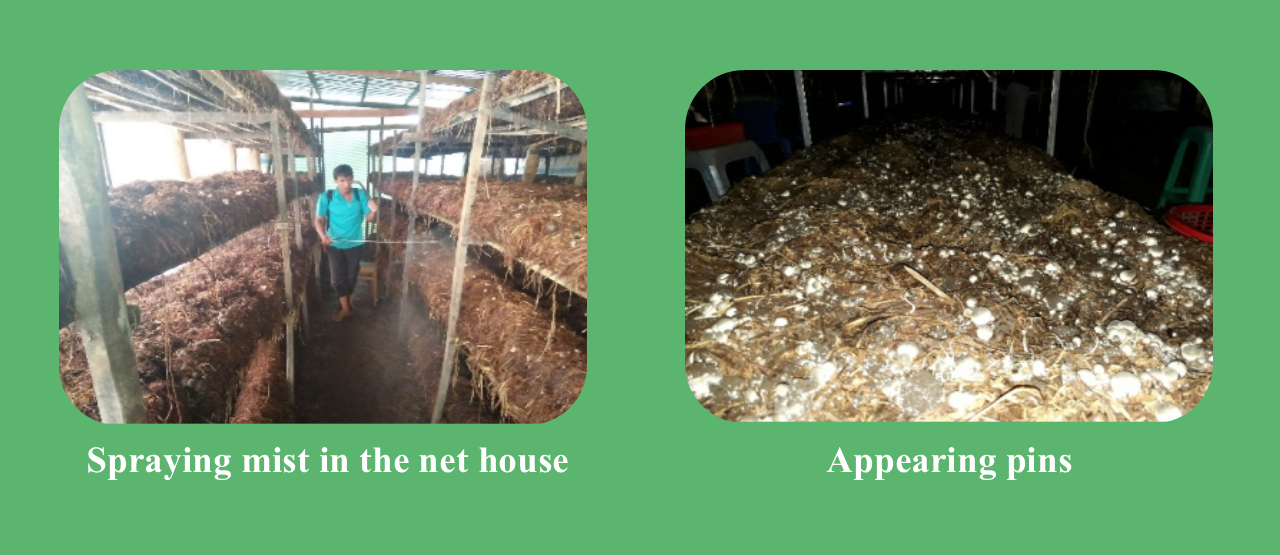
- On the 7th or 8th day, when the mycelium spreads evenly, begin watering for mushroom growth. About 2 days later, the pins will start appearing.
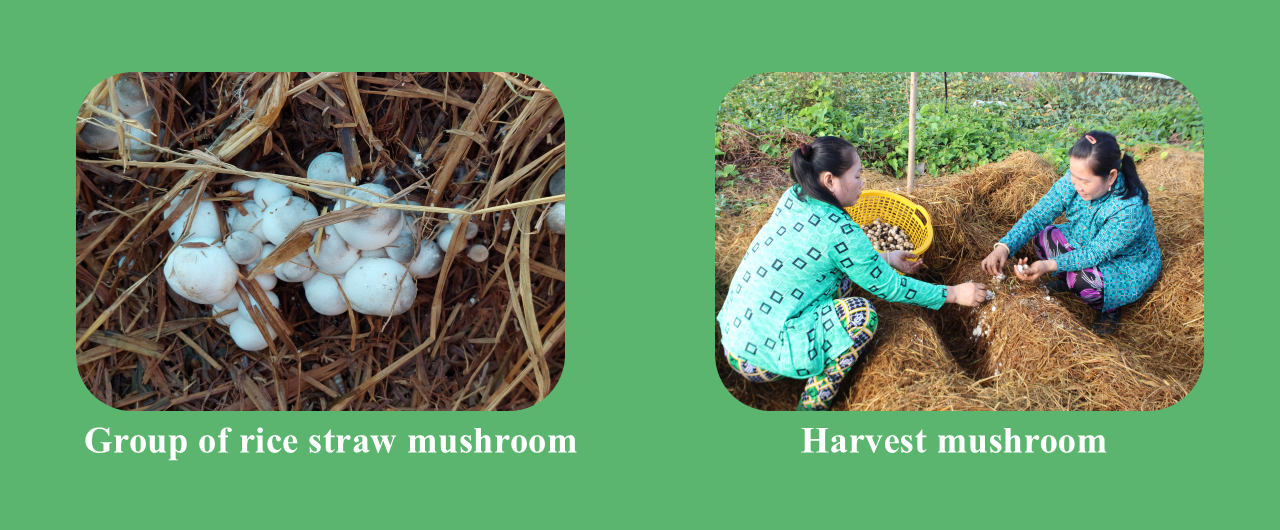
Step 8: Harvesting
- The time from sowing spawn to harvesting is about 12 days. Harvest twice per day, in the morning (5-6 am) and in the afternoon (5-6 pm).
- There are typically 2 harvests. The 1st harvest lasts 4 days. Afterwards, maintain the mushroom bed, and approximately 5-6 days later, more mushrooms will appear.
- Harvesting Method: Gently rotate the mushroom to separate it from the compost bed. Do not leave the mushroom stems (feet) on the bed, because they will rot and damage developing mushroom buds. After harvesting, cover the compost bed.
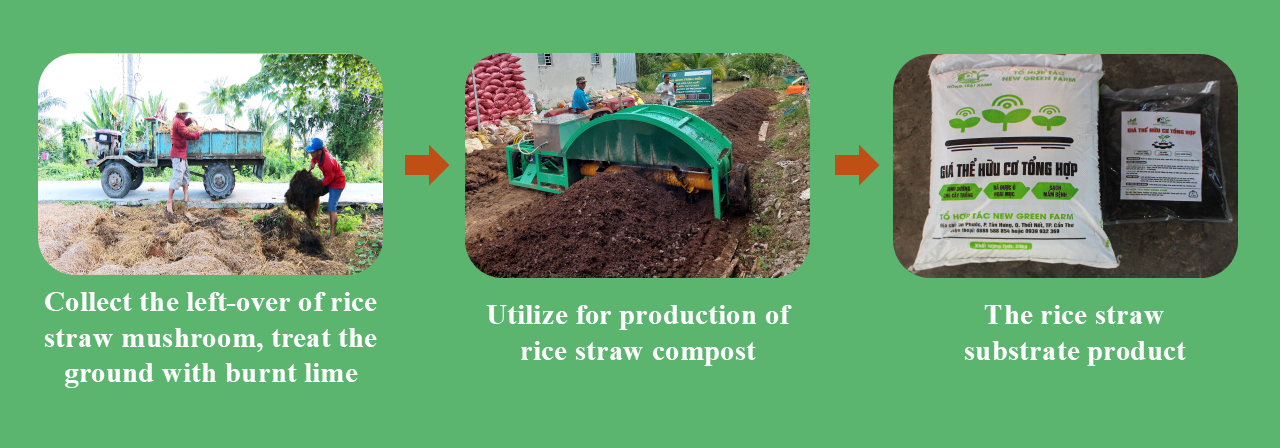
Step 9: Cleaning after Mushrooms Cultivation
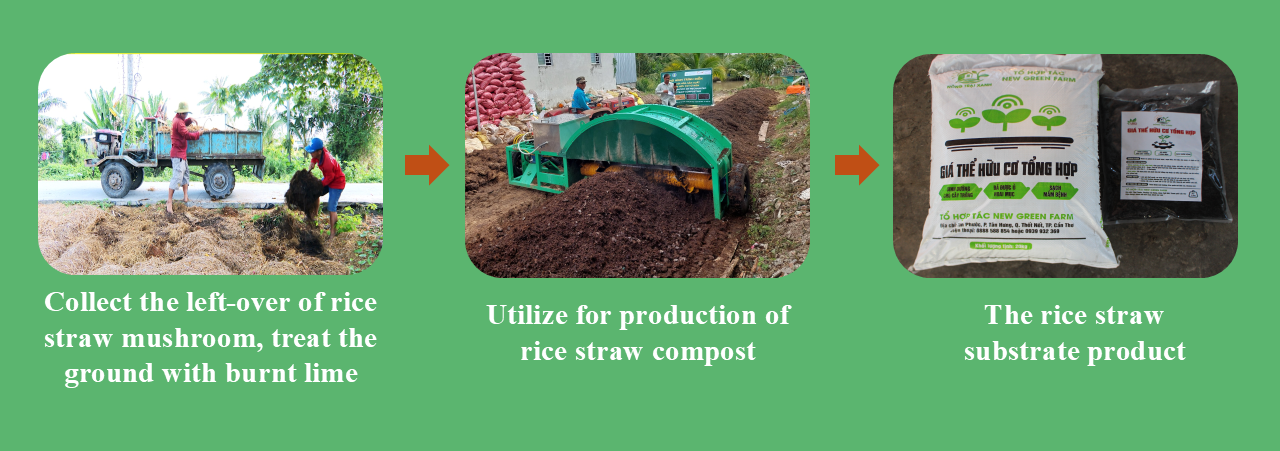
- After harvesting the mushrooms, the substrate can be composted to create organic fertilizer.
- Use burnt lime to disinfect the growing area and leave it exposed to the sun for at least 1 month before growing the next crop.
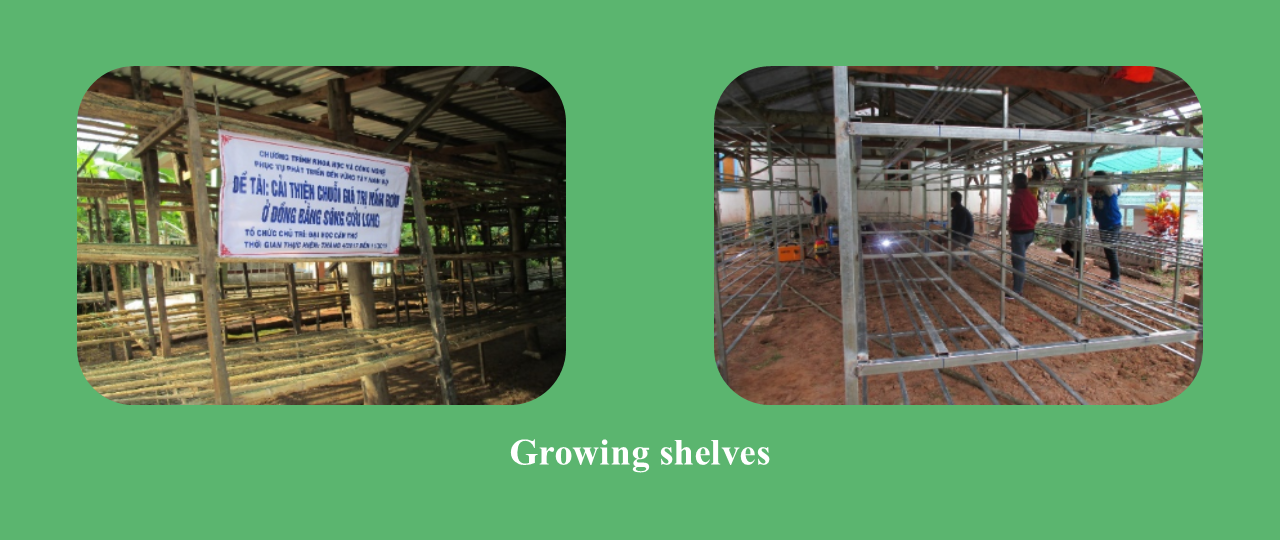
Step 1: Preparing Net House and Shelves
- The net house should be approximately 3m high, 4.5m wide, and 8m long, though dimensions may vary based on local conditions.
- The structure should be covered with a waterproof tarpaulin. An internal layer of orchid netting or wire mesh can be used to help regulate temperature and humidity. It is crucial to ensure proper ventilation.
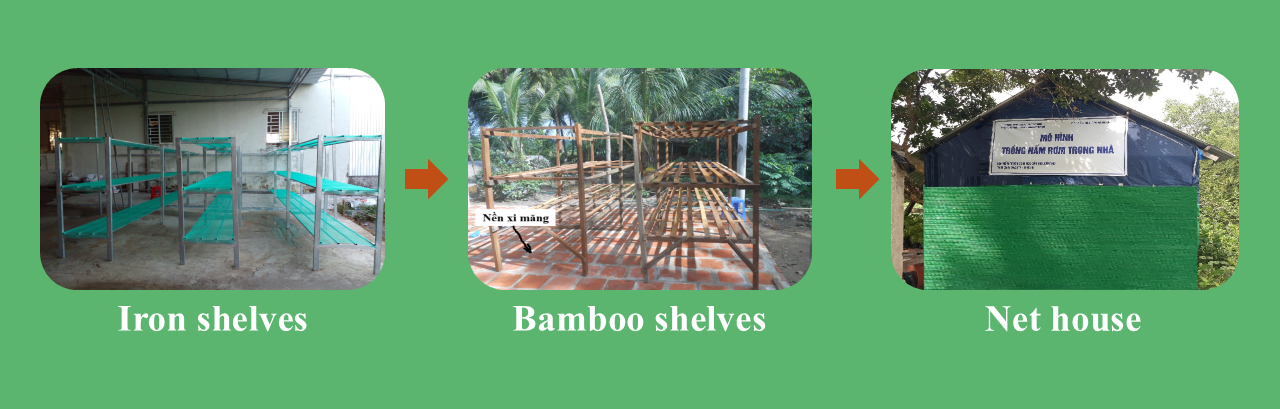
- Growing shelves made of bamboo or iron should feature 3-4 tiers spaced 0.5m apart to allow for easy maintenance and harvesting.
Step 2: Preparing Rice Straw
- Select fresh, disease-free straw that shows no signs of rot.
- Ensure the straw is not contaminated with salinity or pesticides.
- Use bales weighing approximately 14–16 kg or loose straw piles.
Step 3: Soaking of Straw & Straw Treatment
- Prepare a straw-soaking tank near the composting area for convenience.
- Use a waterproof tarpaulin to construct the soaking tank, with size depending on site conditions.
- The ground beneath the tank must be flat and free of sharp debris that could tear the liner.
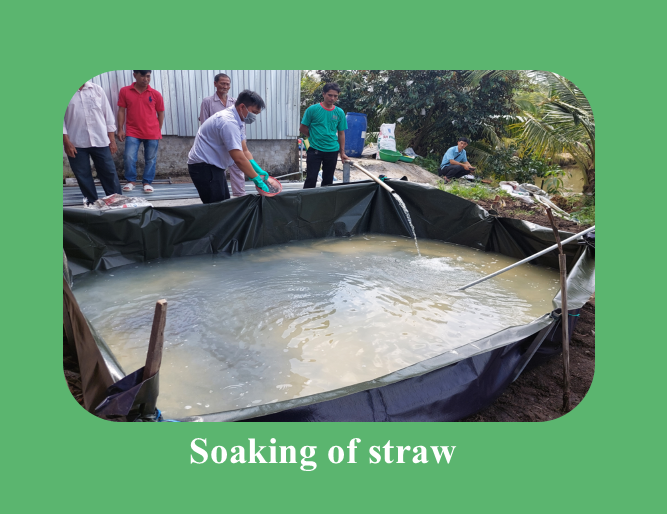
- Prepare lime water: Fill the tank with water to a height of about 20cm, then add lime. Stir well and use pH paper to test the solution (aiming for a pH of 13-14). Usually, about 5 kg of lime is added per 1 cubic meter of water.
- After soaking the straw for approximately 10 minutes, remove and drain it. The straw should turn bright yellow after the lime water treatment.
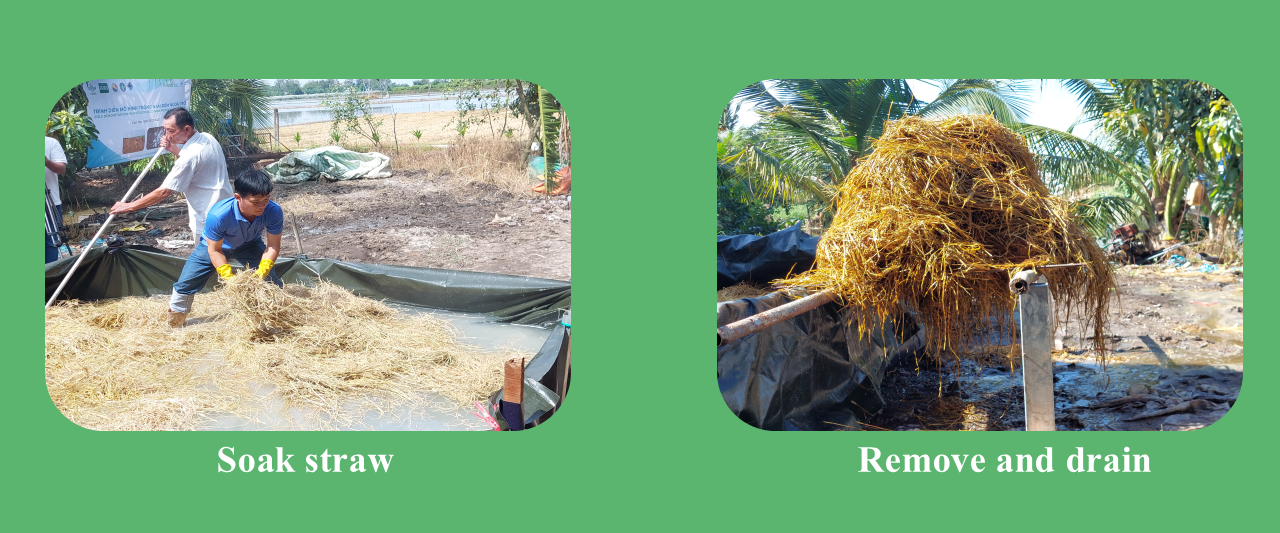
Step 4: Stacking and Turning
- Arrange the straw in layers, placing a banana plant stalk in the middle for aeration, watering each layer, and compressing it by foot to soften it and absorb water (each layer should be 20-30 cm thick). Additionally, sprinkle a layer of lime to eliminate competing fungi. Remove any woody stalks or debris from the watered straw.
- Continue stacking layers until the compost pile reaches the desired size. Use at least 1 ton of raw straw to achieve a pile roughly 1.2–1.5m high, 1.5m wide, and 1.5m long. Remove the banana plants from the middle of the pile to create ventilation shafts. Ensure the pile is well-ventilated and cover it with a waterproof tarp to maintain moisture and heat.
- After 7 days, perform the first turning, rotating the material from the outside in. Add water if dry and compact the pile (if there is excess water, compacting is not necessary). The humidity level must reach 70-75%, and the temperature should exceed 70°C.
- After 10 days, perform the second turning. After 17 days of incubation, the straw is ready for growing mushrooms.
Step 5: Preparing Mushroom Spawn
If using rice husk spawn, select bags with uniform white mycelium (silk) and a pleasant aroma. The spawn is separated and mixed with mycelium-stimulating yeast at the recommended ratio.
Step 6: Putting Compost Straw on Shelves
- Transfer the composted straw to the shelves in the growing house, breaking it apart and compressing it firmly into the beds.
- Mix mushroom spawn with yeast to stimulate growth and supplement nutrition. Spread the mixture evenly over the surface at a rate of 200 g/m2.
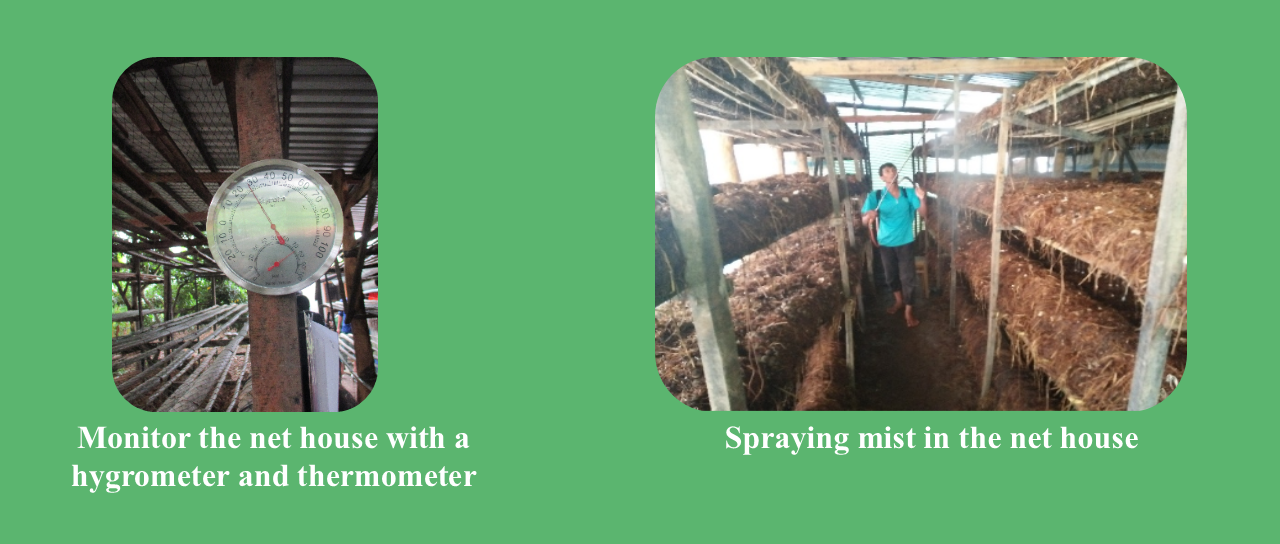
- Incubate the mycelium for 3 days. Regularly monitor the net house temperature and humidity to manage misting and ventilation.
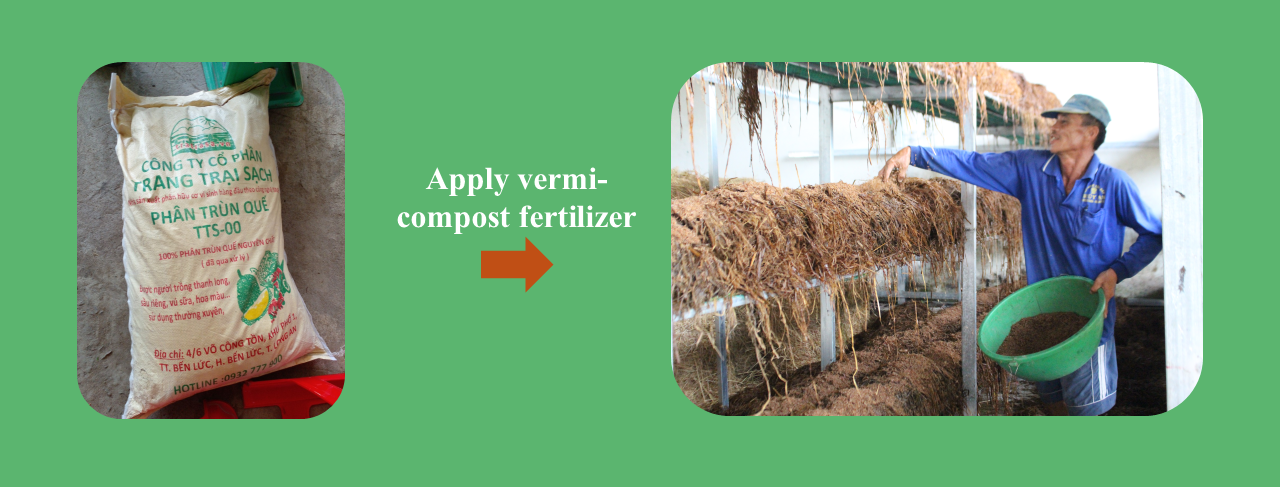
- After 3 days, apply vermicompost fertilizer at a rate of 2 kg/m2.
Step 7: Caring and Watering
- During the incubation period, it is essential to monitor the temperature and humidity of the net house.
- The suitable temperature for the mycelium stage is 15-40°C, with humidity maintained at 50-70%.
- For the fruiting stage, the temperature should be 25-30°C, with humidity between 80-100%.
- At this stage, the substrate does not require abundant moisture. If the temperature is high and the humidity is low, misting the net house is recommended.
- After 7 days, sprinkle water generously to stimulate the mycelium to form fruiting bodies. Combine watering with 12 hours of light exposure to encourage simultaneous pinning.
- Additionally, 0.05% sodium acetate (1 L/m2) can be added to promote better growth.
Step 8: Harvesting
- Harvest straw mushrooms at the “egg” stage. Harvesting should be done twice per day, in the morning (5-6 am) and in the afternoon (5-6 pm), to ensure optimal quality, productivity, and selling price.
- There are generally 2 harvests. The first harvest lasts 4 days. Then, continue maintenance for about 5-6 days until the second flush appears. The second harvest will last about 3 days.

Step 9: Cleaning the Net House
- After harvesting, the substrate can be composted into organic fertilizer.
- Open the tarpaulin to ventilate the net house and use lime to disinfect the surfaces. Fallow the area for at least 1 month before planting the next crop.