

 Bahasa Indonesia
  Tiếng Việt
  ភាសាខ្មែរ
 .png) Filipino
Filipino .png) ພາສາລາວ
ພາສາລາວ 
Techniques for outdoor mushroom cultivation
Step 1 : Preparing Growing Location
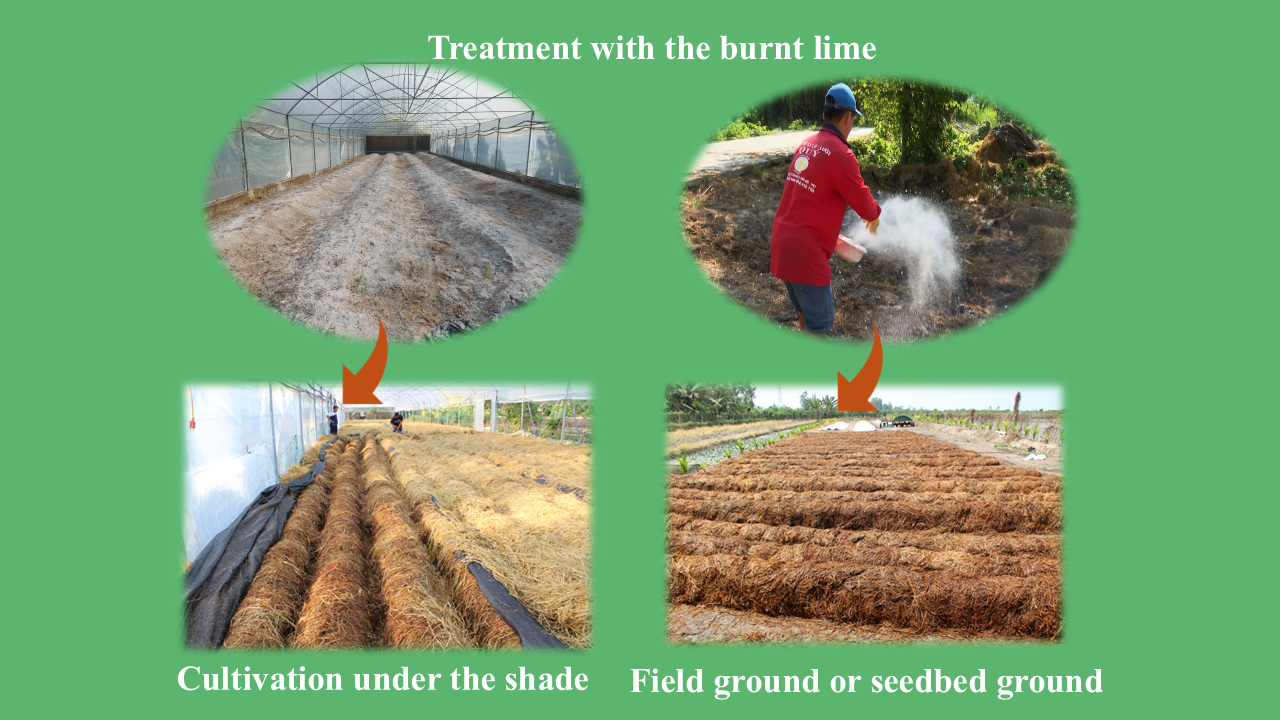
- Straw mushrooms can be cultivated in shaded or direct light locations, such as on fallow field ground or seedbed ground. The chosen growing site must have good drainage to manage watering and rainfall effectively.
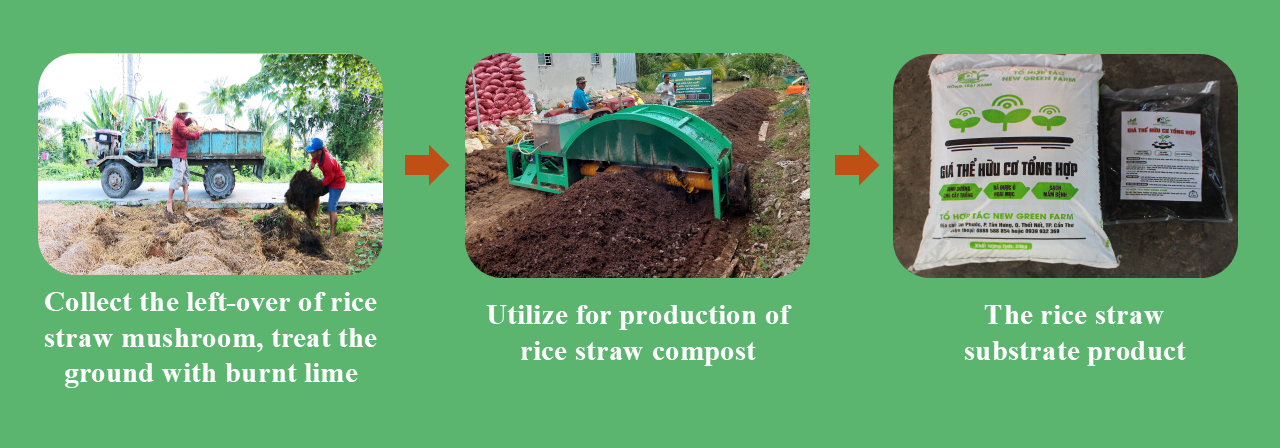
- The soil for cultivating straw mushrooms should be treated with lime at a rate of 5 kg/100 m2 (or 300-500 kg/ha).
Step 2: Straw Source
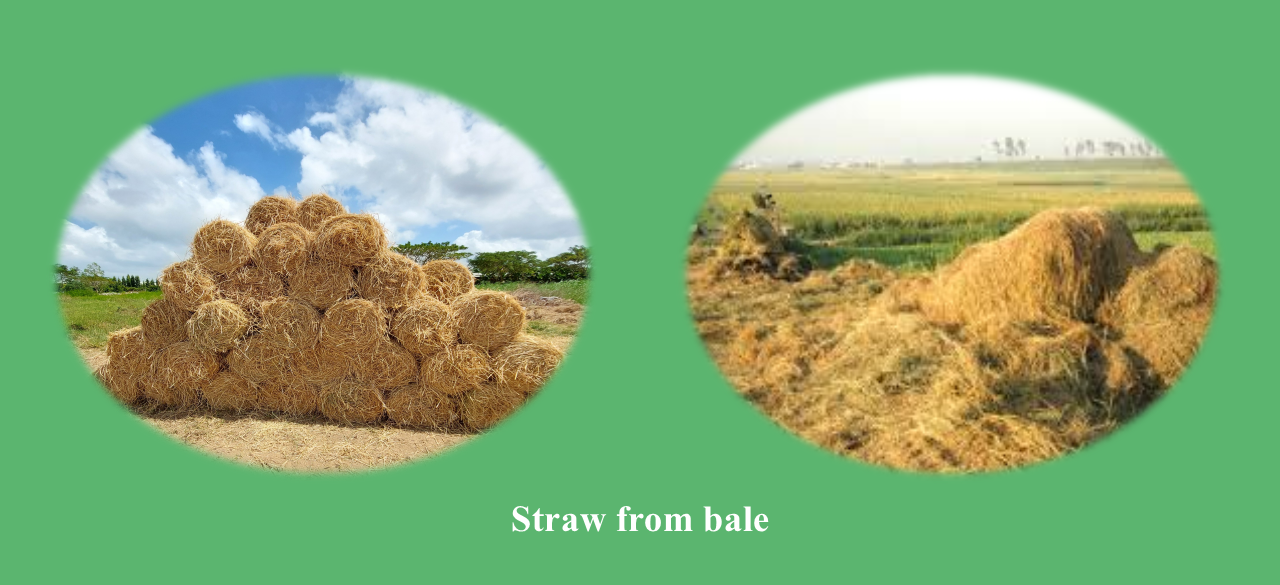
The straw source can be in bale form. The straw must be disease-free, unaffected by pesticides, free from salinity and white mold, and not rotten due to rain.
Step 3: Preparing Rice Straw
- Prepare the ground for the compost pile, in a well-ventilated, well-drained area.
- Select a location with a proactive water source
- Break the straw bales apart or split them in half to loosen the material.
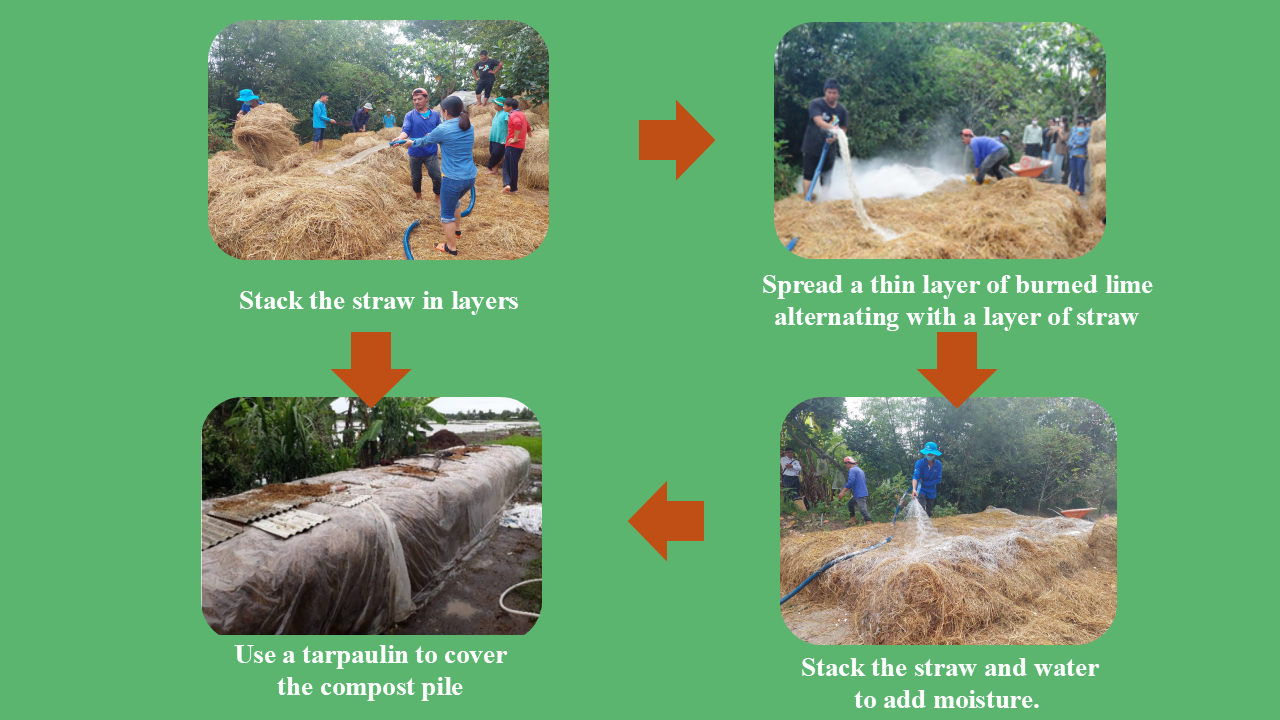
Step 4: Stacking and Turning
- Stack the straw into layers and alternate with burnt lime.
- Water the pile to add moisture.
- Place banana stalks in the middle of the pile to create ventilation for the compost pile
- The amount of straw used should be ≥ 100kg, the size of the compost pile should be about 1.2 – 1.5m high, ≥ 1.5m wide, and at least 1.5m long.
- Use a waterproof tarpaulin to cover the compost pile; ensure there are ventilation holes.
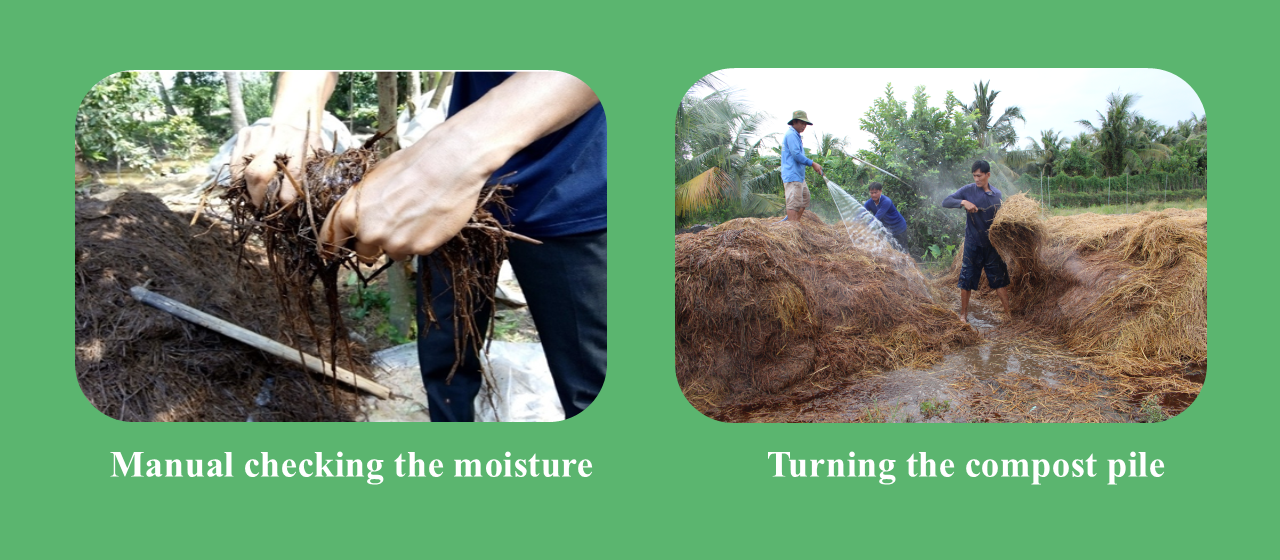
- Monitor humidity levels and add water as necessary, ensuring the temperature remains between 60 – 70°C.
- After 7 and 17 days of composting, turn the pile twice, rotating material from the inside out and outside in.
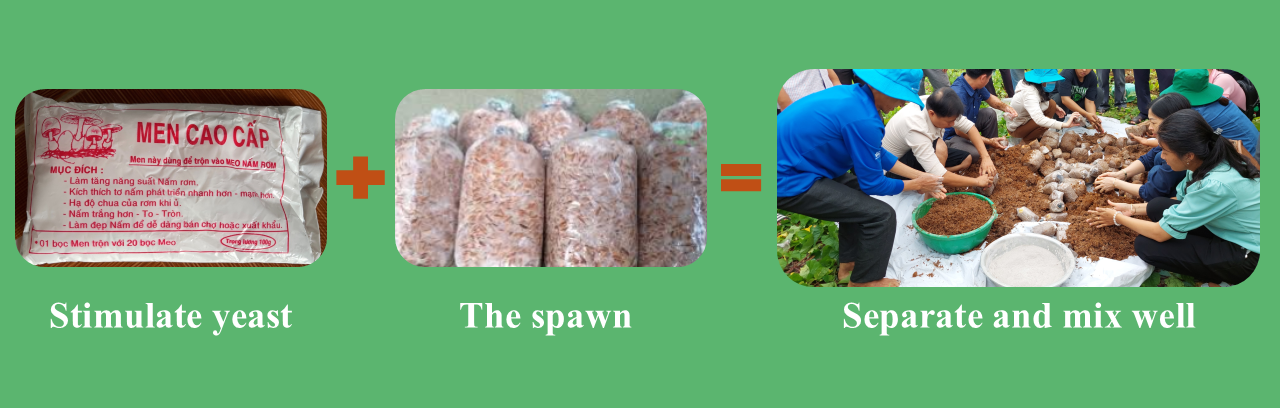
Step 5: Preparing the Mushroom Spawn
- If using rice husk spawn, choose bags with even white mycelium and a pleasant smell.
- The spawn is separated and mixed with mycelium-stimulating yeast at the recommended ratio. Alternatively, mix with vermicompost (at a dose of 70-160g) and mushroom growth stimulants as recommended.
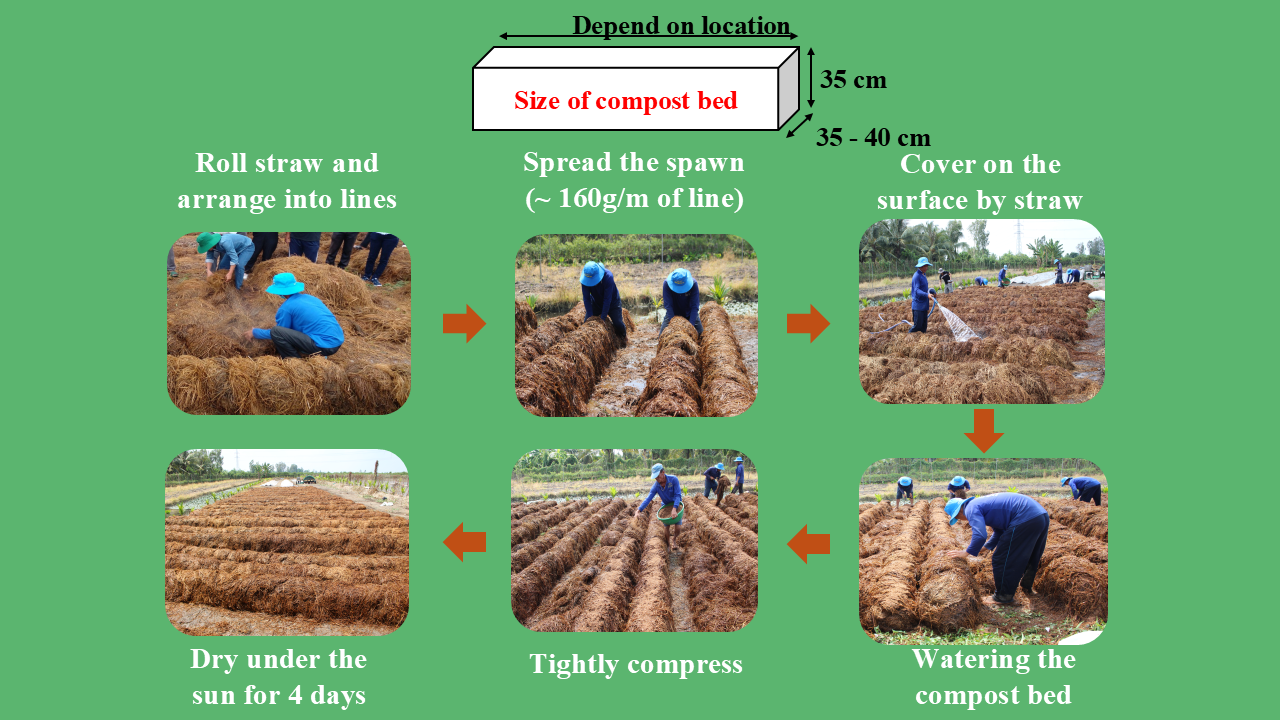
Step 6: Putting Compost in Bed
- After composting for 16-18 days, the compost is placed in a bed. The bed should be 35-40 cm wide and 35 cm high. Straw is taken from the compost pile, rolled, and arranged into lines.
- Following this, a layer of spawn is spread in the middle of the line (approximately 160g/m of line).
- Then the surface is covered with another layer of straw.
- The compost bed is then watered. Using both hands, the compost bed is stroked and tightly compressed. Subsequently, the compost bed is exposed to direct sunlight for 4 days.
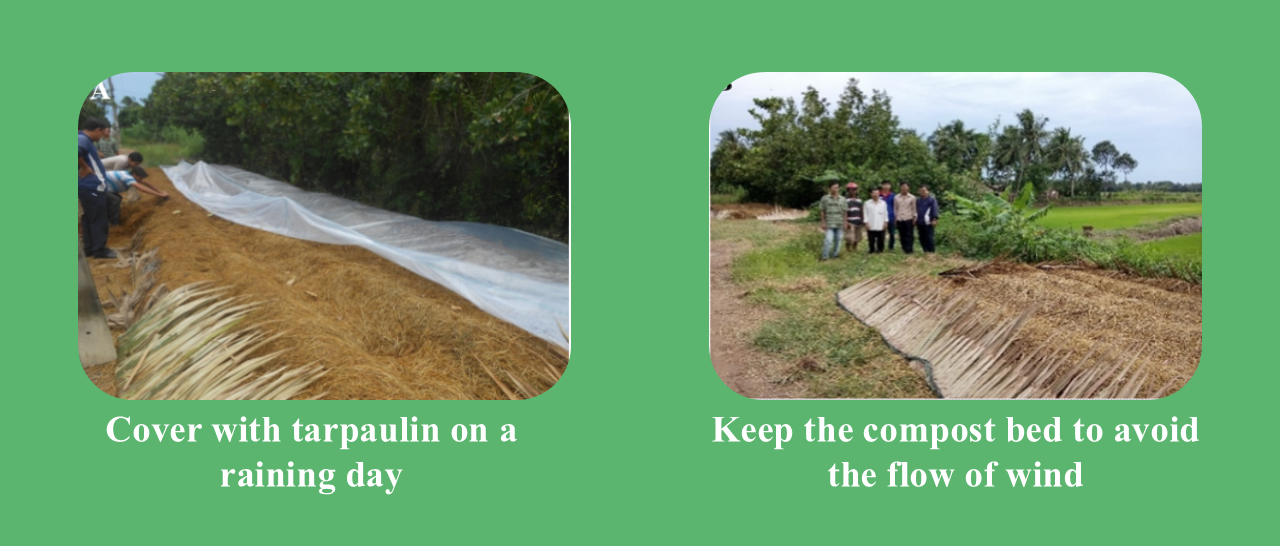
Caution: A tarpaulin should only cover the bed in the rain; make sure the ventilation is good. In windy conditions, arrange the compost lines to avoid direct wind.
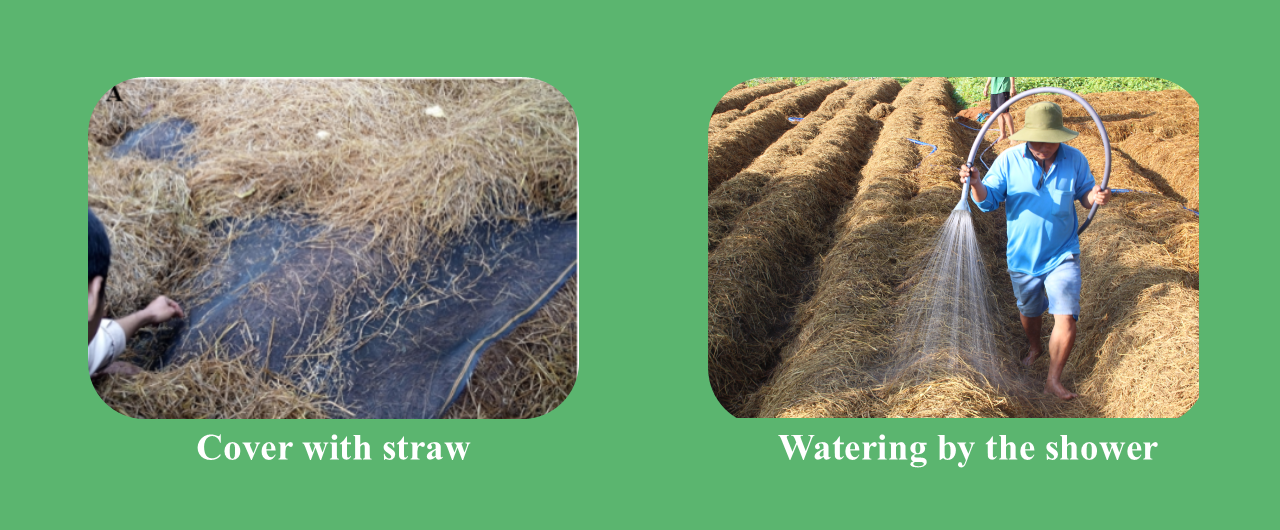
Step 7: Caring and Watering
- After drying in the sun, the bed should be covered with moist straw.
- Watering should be done once daily using a shower head, either in the morning (7-8 am) or the afternoon (about 4 pm).
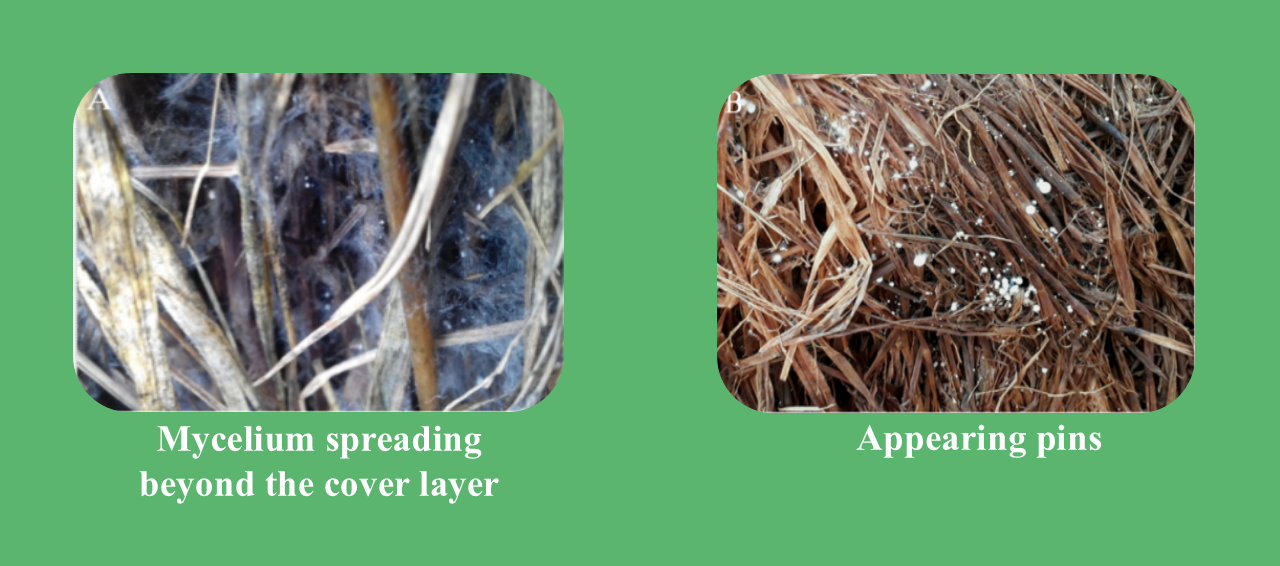
- After covering the straw for 4 to 5 days, check the spread of mycelium and turn the bed cover to limit the mycelium from spreading beyond the cover layer.
- On the 7th or 8th day, when the mycelium spreads evenly, begin watering for mushroom growth. About 2 days later, the pins will start appearing.
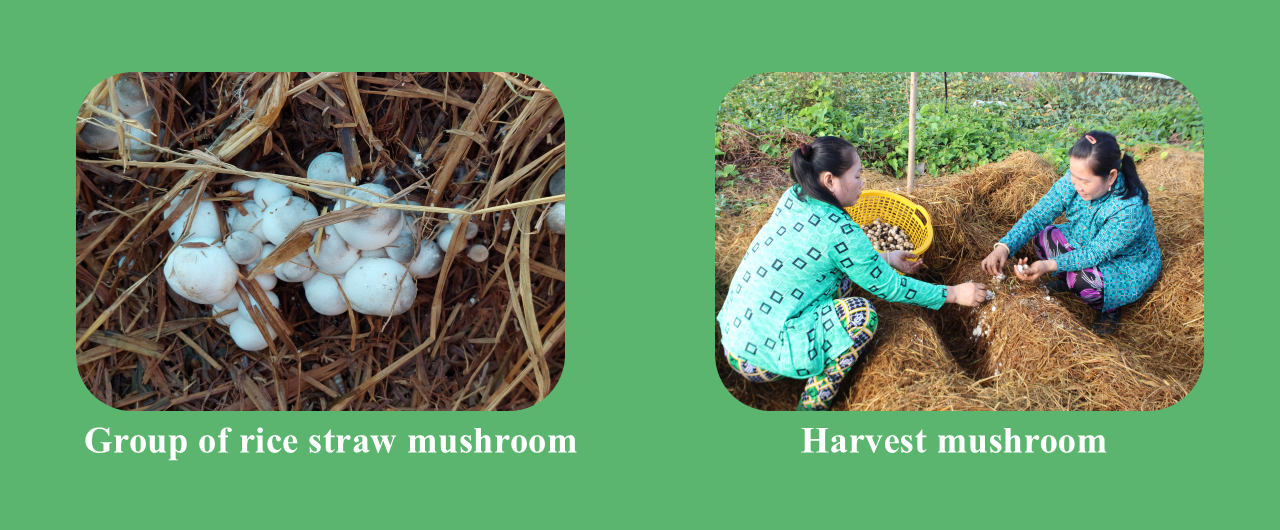
Step 8: Harvesting
- The time from sowing spawn to harvesting is about 12 days. Harvest twice per day, in the morning (5-6 am) and in the afternoon (5-6 pm).
- There are typically 2 harvests. The 1st harvest lasts 4 days. Afterwards, maintain the mushroom bed, and approximately 5-6 days later, more mushrooms will appear.
- Harvesting Method: Gently rotate the mushroom to separate it from the compost bed. Do not leave the mushroom stems (feet) on the bed, because they will rot and damage developing mushroom buds. After harvesting, cover the compost bed.
Step 9: Cleaning after Mushrooms Cultivation
- After harvesting the mushrooms, the substrate can be composted to create organic fertilizer.
- Use burnt lime to disinfect the growing area and leave it exposed to the sun for at least 1 month before growing the next crop.